Showing posts with label baking. Show all posts

Wednesday, 25 November 2015

How to Host a Successful Christmas Cookie Exchange

One of my favorite Christmas traditions is coming up next week! This year will mark the 10th Annual Christmas Cookie Exchange that I will be hosting at my house! It’s a day for us ladies to get together over tea or wine and have appies and catch up, all while trading our new or favorite holiday cookie recipes!!

If you have never been a part of a Christmas Cookie Exchange, let me tell you how it works!! It’s surprisingly easy and a LOT of fun!! Basically, each person who attends the party brings six dozen of their favorite type of cookie, then we make the exchange and everyone brings six dozen different cookies home!!

Ten years ago when I hosted my first cookie exchange, I wasn’t really sure how it worked, so I googled, and found this page . This site gave me a very specific set of rules that, for the first couple of years I was very specific about following… and honestly some of the rules were a little too much for me, so I have relaxed them into the rules below and things have gone much more smoothly ever since!

Recipe for these beauties
Before the rules, a few tips to make your life easier as the hostess of the cookie party!! First of all, give LOTS of notice! I usually send out my invitations (usually as a facebook event) about a month or so before the party. People have very busy social calendars, and if they know about this event well enough ahead, they can also plan to make time for the baking part of the party!! Although some people get stressed about having to bake 6 dozen cookies, remember: that usually just means two batches of a single recipe, since most cookie recipes make 3 dozen cookies!!

Second: Don’t stress!! This is supposed to be a fun event!! I usually have my Christmas tree up mid-November, so my Christmas décor is the only decorating I do for the party, well aside from the beautiful cookies all my friends bring along!! I buy or make a few easy appetizers, open a few bottles of wine and make a pot of tea and we just sit and chat and catch up with each other!

If you have the time, ask your friends to provide you their recipes ahead of time and put together a Cookie Book. It sounds like a lot of work, but it’s super easy and your friends will thank you! When I hosted my first cookie exchange, I asked people to bring copies of their recipes, so if someone LOVED a cookie, they’d be able to bake it! Inevitably, people would forget, so I try to collect everyone’s recipe the week before and print them all off into a little booklet for my guests to bring home! Voila, ten minutes of copying and pasting into a Word document and all of our new favorite recipes in one place to share!!

Finally, I know that people are busy, but busy people still want cookies!! I allow people to bake their cookies and drop them off to me before the party and I will do the exchanging part for them. Last year I had one participant in labour, and another working and one more that had a different party to attend… but they all wanted to bake and exchange cookies, so they brought them over before the party, prepackaged and ready to go and I exchanged their yummies for them! One last thing that may make your life as Cookie Party hostess a little better… and by no means is this necessary, it’s just my OCD coming out to play… if you have an odd number of participants, and you won’t be able to evenly divide cookies (for example 11 people x 6 dozen (72) cookies = 6.54 of each recipe per participant) whip up an extra batch of cookies.

See how amazing having twelve different types of cookies can be????
As the hostess, you are likely already a baker and have a ton of recipes in your arsenal. In addition to making it easier to divide and package cookies (especially when many of the guests pre-package their cookies), if you bring two entries to the party, you LEAVE with double the cookies!!

So, without further ado, and using guidance from Robin’s Rules to Hosting a Cookie Exchange, here are my…


1. All cookies should be homemade, baked and main ingredient must be a type of flour. This means your guests will bring COOKIES. Not Rice Krispie treats, not meringues, COOKIES. After all, this is a Cookie Exchange!!

2. No plain chocolate chip cookies, cookie mixes, no-bakes, meringues or bars. Anyone can open a package and add an egg, this party is for cookies made with love. We allowed bars one year, and they didn’t cut well, they weren’t evenly sized, and they didn’t package and stack like cookies.

3. Please bring 6 dozen total cookies… well maybe a couple extra to share… but really, six dozen cookies. One recipe baked twice, 72 cookies. It makes it easier for sorting and separating when the actual exchange part of the party, and means that no one is shorted cookies because someone only managed to bake 60 cookies.

4. Email a copy of your recipe before the party (or bring recipe to the party). In addition to putting together a Cookie Book like I do, having everyone provide their planned recipes in advance means that you won’t get duplicates. Not that having four kinds of shortbread is the worst problem to have, but variety is the spice of life!!

5. If you don't have time to bake, or have burnt your cookies, but still want to attend, you must go to a real bakery and buy 6 dozen yummy cookies. This one is pretty self-explanatory! In all of my years, it’s only happened on time that someone had to bring bakery cookies!!

I am so so so looking forward to this year’s festivities!! This year’s Cookie Book already has recipes for Oreo Peppermint Crunch Cookies and Salted Caramel Stuffed Snickerdoodles. I. Can’t. Wait!!!!!! Thanks for stopping by today! I really appreciate it!!

Sunday, 29 March 2015

Super Amazing Giant Oatmeal Chocolate Chip Cookies

Rainy Sundays in our house mean one thing - time to bake!! After another busy week, and some sleepless nights with a certain 8 year old, it was nice to come home from church today and have absolutely nothing to do. The hubs headed off to work and the girls and I decided to retry a recipe that completely failed a few weeks ago!

My first attempt at these cookies - FAIL!!
I found this recipe in HGTV Magazine and made a few tweaks to accommodate a few ingredients I didn't have on hand. After following the actual baking directions this time, these cookies turned out soft, chewy and gigantic!! The first time I made these cookies, I just used my regular cookie scoop and placed them "normally" on the cookie sheet for baking. Had I read the full baking instructions, I would have noticed that this recipe makes "big, bakery-size, gooey cookies."


Super Amazing Giant Oatmeal Chocolate Chip Cookies
Recipe adapted from HGTV Magazine

Ingredients

1 3/4 cup flour
1 tsp baking soda
1/2 tsp salt
2 sticks butter, softened
1 cup brown sugar
3/4 cup white sugar
2 eggs
2 tsp vanilla extract
1 1/4 cups chocolate chips
1 1/4 cups rolled oats

Instructions

Preheat oven to 375F and line two large baking sheets with parchment paper. Beat the butter and sugar together for two minutes, until light and fluffy. Add the eggs and vanilla and beat until just incorporated. Scrape the edge of the bowl and mix again to make sure it all comes together.
Add the flour, baking soda and salt and mix until combined. Next, stir in the chocolate chips and rolled oats.

Form the dough into balls of about 4 tbsp each (for me, this meant a heaping scoop of my large cookie scoop). Arrange the dough onto the parchment lined baking sheets approximately 2 inches apart. *** This is the most important step!! These cookies spread out a LOT, so make sure to space them well. I used a large cookie sheet and only had 14 cookies on each sheet.

Bake until the cookies are lightly browned on the edges, approximately 15 minutes. Let cool for for two minutes then remove to baking rack to cool completely.

I hope you all love these cookies as much as the girls and I do!! Thanks for stopping by, I hope I have inspired you today!

Sunday, 22 March 2015

Twix Shortbread Cookies

What an amazing week!! Our littles were on spring break for the past two weeks, and while I would like to say that we had a restful relaxing couple of weeks, the total chaos that we did have was a ton of fun!

The girls Irish danced in twelve shows over the course of last week and although we had a wig catasrophe, both girls had a ball dancing their Irish hearts out for people.

This week at work we had our annual Bake Off. Each of the participating bakers had to bring in their favorite recipe, with servings for 100 people, plus 3 judges. I decided to make these yummy cookies I found on Pinterest. I cut them in half so that the public would each get a serving, and then brought full sized cookies for the judges. I ended up making the recipe 3 times to have enough for all the servings I needed, plus a tray for our house!!

Although I didn't win (that honour went to a ridiculously amazing cheesecake) I got a ton of positive feedback on the cookies I brought!

Twix Shortbread Cookies
Recipe adapted from here
Ingredients
2/3 cup butter, softened

1/2 cup sugar
2 egg yolks
1 tsp vanilla extract
1 1/2 cups flour

Toppings:
3/4 cup caramel sauce
6 ounces chocolate wafers, melted

Instructions

To make the cookie layer, preheat the oven to 375F. In the bowl of your mixer, combine 2/3 cup butter, sugar, egg yolks and vanilla. Combine ingredients until the butter is creamy, scraping the edges of the bowl. Add the flour and mix at low speed until well combined. Cover and refrigerate dough for an hour, until firm.

Shape the dough into 1" balls. Place dough 2" apart on cookie sheets. Make an indentation in the cookie balls with the back of a wooden spoon. Bake 8-10 minutes until the edges are start to golden.

Remove from the oven and place cookie sheets on a wire rack to cool completely.

After the cookies have had a chance to cool completely. Put the caramel sauce into a piping bag and lightly pipe caramel into the indentations. While the caramel is settling into the indentations, melt the chocolate wafers using a double boiler.

Using a fork, drizzle the melted chocolate over the cookies. Refrigerate for ten minutes, to allow the chocolate to harden over the cookies.

I hope you enjoy this recipe! I know that the cookies I tried to keep at our house were gone in about ten minutes!!

Wednesday, 25 February 2015

Cinnamon Swirl Bread

Sandwiches. When I was a kid, that's what I had in my Rainbow Brite lunchbox. Every. Day. Flash forward so many years into the future and I have two littles packing lunchbags to school every day. BOTH of my small people refuse to eat sandwiches and this mama is running out of options.

I have had a lot of success with sending baked goods with the girls instead of sandwiches, and I wanted to try something other than these (awesome) Banana Oat Muffins that I make every other week. While watching tv the other week, we saw an ad for Robin Hood quick breads and the girls wanted to try them. I hit up my fave recipe site allrecipes.com and searched for a Cinnamon Bread recipe. I specifically was looking for a recipe that didn't include yeast (like a loaf of bread) and could be made with ingredients that I have on hand all the time.

Cinnamon Swirl Bread 
Recipe adapted from AllRecipes.com

Ingredients


1/3 cup brown sugar
2 tsp ground cinnamon
2 cups flour
1 tbsp baking powder
1 cup brown sugar
1 egg, beaten
1 cup milk
1/3 cup vegetable oil

Instructions

Preheat oven to 350F. Grease a 9x5 loaf pan with non-stick spray. In a small bowl, combine 1/3 cup brown sugar and 2 tsp cinnamon. Set aside.

In a large bowl, combine flour, baking powder and remaining brown sugar. Combine egg, milk and vegetable oil. Stir wet ingredients into dry and stir until just combined.

Pour half of the batter into the prepared pan, sprinkle with half of the cinnamon and sugar mixture. Pour the remaining half of the batter on top, and then top with the remaining cinnamon and sugar.

Bake for 45-50 minutes, until a toothpick inserted into the loaf comes out clean. Let cool on wire rack for ten minutes. Slice into delicious slices and serve warm if you can!!

I plan on making these into muffins next week for the littles to be able to pack along easier when they go to dance class. When I make them into muffins, I'll modify this recipe with the new cook time.

Thanks for stopping by, I hope I've inspired you a little today!

Wednesday, 14 January 2015

The Dunbar - Chocolate, caramel, pecan and oat bar

Hello my friends!! Today I have a super amazing, ridiculously easy and crazy delicious recipe to share with you! About a year ago I was home in the afternoon and caught an episode of Steven and Chris. For those of you who don't watch, Steven and Chris is a Canadian talk show that focuses on lifestyle, home decor and cooking. It's quite entertaining and the hosts always make me laugh.

On the particular day that I was watching, the hosts had a baker on the show who has a downtown Vancouver bakery called Butter Baked Goods and she was making a glorious looking recipe called the Dunbar. It was a combination of cookie, chocolate, caramel and deliciousness. I was running out the door as the recipe was being presented, so I pvr'd the episode and finally watched it months later.

Fast forward to May and our social committee at work was having a bake off. Participants were asked to bring 100 mini servings of a baked item and they would be served and judged by the people who came to try the baked goods. I can't remember how I placed at the bake off, but my Dunbar's were all gone and I had a ton of people asking me to share the recipe.


The best part about this recipe (I think) is that instead of needing heavy cream and melting caramels, I was able to use a jar of caramel sauce! I found the one I used at Target for only $3.99. The original recipe calls for dulce de leche, but this sauce does the same thing and the recipe turned out fantastic!


I finally made these again over Christmas for a friend's pajama party and actually remembered to take photos so I could share them with all of you!! I hope you enjoy these as much as I did!!

The Dunbar 
Original Recipe from Butter Baked Goods


Ingredients

1 1/2 cups all-purpose flour
1 teaspoon baking soda
1/2 teaspoon salt
1 cup butter
1 cup dark brown sugar
1 1/4 large-flake rolled oats
3/4 cup chocolate chips
1/2 cup pecans, lightly chopped
3/4 cup caramel sauce or dulce de leche

Instructions

Preheat oven to 350F. Line a 9x9 square pan with parchment paper. Trust me, don't skip this step, or you will never get your delicious treat out of your pan! And get a piping bag, the kind that you would normally use to ice cupcakes. This isn't totally necessary but will definitely make your life (and caramel application) much much easier.

Cream together butter and sugar, making sure to scrape the sides of the bowl to make sure it's all incorporated. Mix in the dry ingredients until well combined. Divide the dough in two and press the first half of the mixture into your parchment lined pan. Sprinkle the chocolate chips and pecans over the cookie dough.


Put the caramel sauce into the piping bag. Pipe the caramel sauce over the chocolate chips and pecans. You could try to use a spoon and just scoop it onto the chocolate chips, but from experience, it is gloopy and hard to spread evenly. Take the second half of the cookie dough mixture and sprinkle it over top of the chocolate chip/pecan/caramel mixture. Lightly press down over the caramel mixture.

Bake for approximately 30 minutes, or until golden brown. When it's done, allow to cool in the pan before using the parchment paper edges to lift it out of the pan. Use a long, sharp knife to cut into bars. Make sure to keep the ones at the very edge of the pan for yourself! That part is my favorite!


Thanks so much for stopping by! I hope I have inspired you a little today!

Thursday, 24 July 2014

White Chocolate Macadamia Nut Cookies

Hello friends! I hope you all enjoyed my last post, Chocolate Chip Banana Bread with Oats. I certainly had a great time baking them and the girls had a great time eating them! We went through a whole loaf the first day!!

This summer we are trying to do something new each week. We are trying to hit up a new park each and every week, try some new recipes when we can and go on new adventures together. So far we have gone to two new water parks, hit up our local night market for street fare and baked some new goodies together.

I asked Miss A what she would like to bake that we haven't baked before. She was quick to come up with an answer - White Chocolate Macadamia Nut cookies, just like the ones from Subway! So off to my best friend (google!!) to see if I could find someone claiming to make a cookie just like the ones from Subway. I came across the Orgasmic Chef and knew that I needed to try her recipe for no other reason than her website name is amazing!!

This recipe makes a ton of cookies - Miss A had plenty and I brought a whole bunch to work too!


White Chocolate Macadamia Nut Cookies
Adapted from The Orgasmic Chef

Ingredients
3¼ cups flour
1 tsp baking soda
1½ cups salted butter, softened
1½ cups brown sugar
1 cup white sugar
2 eggs
2 tsp vanilla extract
1 cup white chocolate chip
1¼ cups coarsely chopped macadamia nuts


Instructions

Preheat oven to 350F. Line cookie sheets with parchment paper. In a medium bowl, combine flour and baking soda. In the bowl of your mixer, cream together the butter and sugars. Add eggs one at a time, then add vanilla extract. Scrape down the sides of the bowl and mix again.

Slowly add the flour mixture and mix well. Stir in the white chocolate chips and macadamia nuts gently.

Using a medium cookie scoop, drop cookie batter onto prepared cookie sheets and bake for 13-15 minutes.

Thanks for stopping by today! I hope you like this recipe!!


Wednesday, 23 July 2014

Freezer Cooking: Chocolate Chip Banana Bread with Oats

Hello world!! I can't believe it's been seven months since my last post! Life is just so busy and between my two crazy girls and work and my husband I haven't had a spare minute to post!

I did try out a bunch of new recipes, and took photos along the way, so hopefully I'll find some time to get my fingers to type out the recipes for you guys!!

The recipe for today's banana bread is beyond simple! I found it in a book filled with great recipes, specifically for big batch cooking. The book is called "Not Your Mother's Make-Ahead and Freeze Cookbook" by Jessica Fisher. I doubled the recipe and made it twice (so four times the original recipe) and it made EIGHT glorious loaves of goodness. For the recipe below I am putting the original recipe amounts from the cookbook, so it'll make two loaves. I also use foil loaf pans from the dollar store (3 for $1) when baking these, so they are easy to freeze, transport and gift to others.

Today was rainy and the girls and I spent the day cleaning the house and baking and just chilling out. It was a great way to spend the day!

Chocolate Chip Banana Bread with Oats

(Recipe from Not Your Mother's Make-Ahead and Freeze Cookbook)

Ingredients
1 cup sugar
2/3 cup vegetable oil
2 eggs
1/4 cup buttermilk
1 tsp baking soda
1 cup mashed banana
1 1/3 cup flour
1/3 cup oats
1 tsp vanilla extract
1/2 cup chocolate chips, plus another handful to sprinkle on top

Instructions
Preheat oven to 350F. In a large bowl combine all of the ingredients and mix until well blended. Pour the batter evenly between two pans. Sprinkle another handful of chocolate chips on the top, just because chocolate makes me happy.

Bake for about an hour or until a tester inserted in the center comes out clean.

A clear plastic treat bag (like the kind you use for goody bags) fits one of these loaves perfectly. You can seal one up and freeze them this way. It's also perfect for when you are making a bunch of banana loaves for a bake sale or some other fun event.

Thanks for stopping by today, I hope you like this recipe!!

Tuesday, 19 November 2013

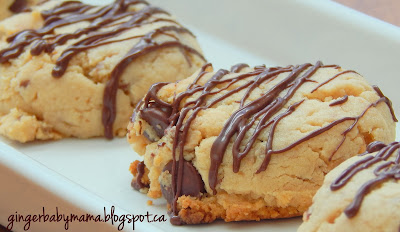
Peanut Butter Heath Bar Cookies

Hello my friends! Long time, no see! Life has been crazy busy, but lots of fun. I have had so many adventures in the past few months, but unfortunately not a ton of time to chronicle our fun.

I'm back today with another fun recipe for you all. For the eighth straight year, I am hosting a (very strict) cookie exchange. I invite a few of my nearest and dearest and we all bake up 6 dozen cookies. As much as possible, I try to limit the cookie recipe types so we don't end up with five kinds of shortbread (that happened one year!) so we have a big range of cookies. This year the list is shaping up quite nicely. I'll be sure to report in with all the goodies after the party.


Anyhoo, back to today's recipe. I tried a test batch of the recipe today to make sure that these cookies were as amazing as the recipe made them out to be. They are de-lish!

Peanut Butter Heath Bar Cookies

Adapted from a recipe in this book


Ingredients

2/3 cup crunchy peanut butter
1/2 cup butter, softened
1/2 cup white sugar
1/2 cup packed brown sugar
1 egg
2 cups flour
3 tsp baking powder
1/2 tsp salt
1/2 cup Heath bar bits (or Skor bits)
3/4 cup + 1/4 cup chocolate chips
1 tsp shortening

Instructions

Preheat oven to 375F. In the bowl of your standing mixer, combine peanut butter, butter, white and brown sugars and mix until creamy and smooth. Beat in egg until combined. Combine flour, baking powder and salt in a bowl. Add dry mixture to peanut butter mixture and mix until well incorporated. Add the Heath bar bits and 3/4 cup chocolate chips.

Using a medium cookie scoop, drop onto a parchment lined cookie sheet. Bake for 8-10 minutes, until the edges of the cookie just begin to brown. Remove from the oven and squish just a little bit with the back of a fork.  Allow to cool on cookie sheet for 10 minutes.

At this point, it would make your life much much easier if you shifted all of the cookies onto one cookie sheet, with little to no gap between the cookies. In a small glass bowl, combine remaining 1/4 cup chocolate chips and 1 tsp shortening. Microwave in 20 second increments, stirring between each heating. When the mixture is stirred completely smooth, head back to your cookies. Using a fork, lightly drizzle the melted chocolate over the cookies.

I hope you enjoyed this recipe! They were certainly popular in my house today - half of the batch is gone already!!!


I will hopefully be linking this recipe up to A Bowl Full of Lemons, Delightful Order, Doodles and Stitches and Joyful Homemaking.

LinkWithin

Related Posts Plugin for WordPress, Blogger...